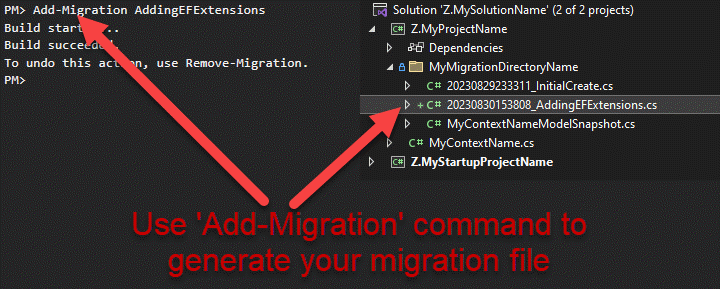
Adding a migration in EF Core is the process of capturing model changes since the last migration and generating migration files from those changes. To create those migration files, an Add Migration command must be run. This command compares the current context with the last migration created (if there was one) to detect what has changed in the model.
There are 2 ways to run the Add Migration command and both will be covered in this article:
Add-Migration: When using the Package Manager Console (PMC)dotnet ef migrations add: When using the .NET Command Line Interface (.NET CLI)

The Add Migration command is one of the 3 main migration commands:
- Add Migration
- Update Database
- Remove Migration
How to use the Add Migration command with PMC in EF Core?
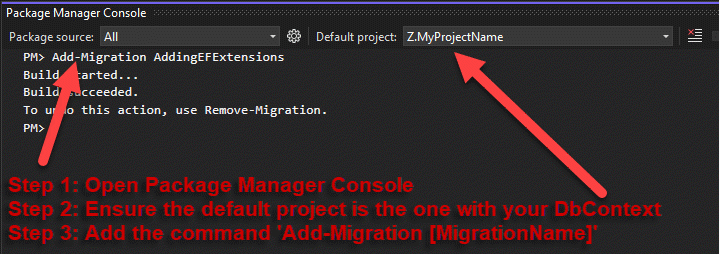
To use the Add-Migration command with the Package Manager Console (PMC) in EF Core:
- First, open the Package Manager Console in Visual Studio.
- Ensure the default project in the console is the one containing your EF Core DbContext.
- Enter the following command:
Add-Migration [MigrationName]
NOTE: Replace [MigrationName] by the name you want to give to your migration.
See Package Manager Console Parameters for additional parameter options.

How to use the Add Migration command with .NET CLI in EF Core?
To use the dotnet ef migrations add command with the .NET Command Line Interface (.NET CLI) in EF Core:
- Open a command prompt or terminal.
- Navigate to the directory containing your context.
- Run the following command:
dotnet ef migrations add [MigrationName]
NOTE: Replace [MigrationName] by the name you want to give to your migration.
See Command Line Parameters for additional parameter options.

What does the Add-Migration command do in EF Core?
When you use the Add-Migration command with PMC or dotnet ef migrations add with .NET CLI, both utilize EF Core Tools to perform several tasks:
- First, EF Core Tools look at your DbContext and Model.
- Then, EF Core Tools compare the current context against the one from the Model Snapshot (if there is one) to find any changes.
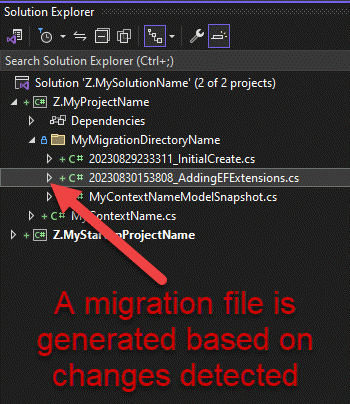
- Based on this comparison, new migration files are generated. These files contain the necessary code to apply and revert those changes in the database.
- After creating a new migration, you can apply it to your database with the Update-Database command or remove it using the Remove-Migration command.

What are the parameters for the Add Migration command in EF Core?
Package Manager Console (PMC)
The Add-Migration command with PMC offers several options. While specifying the migration name is mandatory (the console will ask for one if not specified), all other options are optional:
| Option | Description |
|---|---|
| -Name | The name of the migration you want to create. While the -Name parameter is there, it's often simpler to directly specify the migration name as the first parameter. For example, Add-Migration AddingEFExtensions will create a migration named AddingEFExtensions. |
| -OutputDir | The output directory relative to the project where migration files will be created. For example, Add-Migration AddingEFExtensions -OutputDir MyMigrationDirectoryName will create the migration file in the MyMigrationDirectoryName directory. |
| -Namespace | The namespace to use for the generated classes in the migration file. If omitted, the following namespace [ProjectNamespace].[OutputDirectoryName] will be used. For example, Add-Migration AddingEFExtensions -Namespace Z.MyMigrationNamespace will add classes in the Z.MyMigrationNamespace namespace. |
| -Context | The context class to use to generate the migration file, it can be either the name or the fullname including namespaces. For example, Add-Migration AddingEFExtensions -Context Z.MyContextName will generate a migration for the Z.MyContextName context. |
| -Project | The project containing the context used to generate the migration file. If omitted, the default project in the Package Manager Console is used. For example, Add-Migration AddingEFExtensions -Project Z.MyProjectName will generate a migration for the context in the Z.MyProjectName project. |
| -StartupProject | The project with the configurations and settings. If omitted, the startup project of your solution is used. For example, Add-Migration AddingEFExtensions -StartupProject Z.MyStartupProjectName will make a migration using the configurations and settings of the Z.MyStartupProjectName project. |
Add-Migration [MigrationName] -OutputDir MyMigrationDirectoryName -Namespace Z.MyMigrationNamespace -Context Z.MyContextName -Project Z.MyProjectName -StartupProject Z.MyStartupProjectName
Tips:
- DO NOT use
-Name. Directly specify the name as the first parameter of theAdd-Migrationcommand. - DO NOT use
-OutputDirafter the first migration. EF Core Tools can automatically locate the output directory for later migrations. - DO NOT use
-Project. Instead, select the default project in the console (personal preference).
NOTE: The -Project option specifies which project contains the context, while the -StartupProject option indicates the project that has the application's configurations and settings.
.NET Command Line Interface (.NET CLI)
For those who work outside of Visual Studio or prefer the command line, EF Core Tools provide similar features for .NET CLI but with a bit different syntax:
| Option | Short | Description |
|---|---|---|
| [MigrationName] | The name of your migration. It's placed directly after the add command in dotnet ef migrations add [MigrationName]. |
|
| --output-dir | -o | The output folder related to the project. |
| --namespace | -n | The namespace for the created classes in the migration file. |
| --context | -c | The context class used to create the migration file. |
| --project | -p | The project that has the context for making the migration file. |
| --startup-project | -s | The project with the configurations and settings. |
dotnet ef migrations add AddingEFExtensions -o MyMigrationDirectoryName -n Z.MyMigrationNamespace -c Z.MyContextName -p Z.MyProjectName -s Z.MyStartupProjectName
NOTE: Check the documentation above about Package Manager Console Parameters for more examples and tips.


